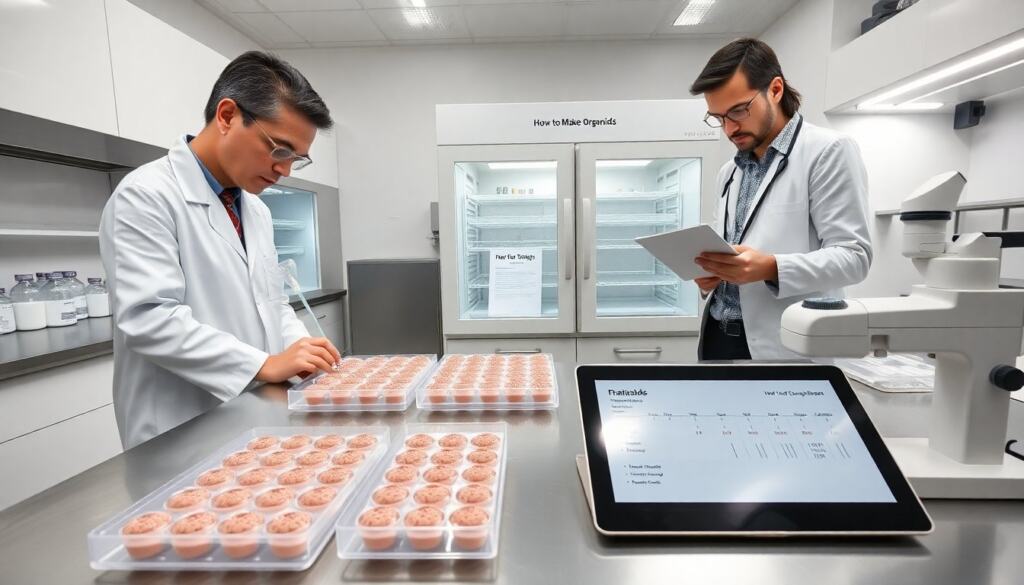
how to make organoids is a practical skill for researchers and students. This guide gives clear steps, safety notes, and material lists. It focuses on reproducible methods that beginners can follow. The text uses simple sentences and direct advice. It avoids jargon and stays precise. Readers will learn when to use organoids and what common pitfalls to avoid. Throughout, emphasis is placed on experimental design, record keeping, and iterative optimization so users can reproduce and troubleshoot their work as they learn how to make organoids effectively.
Key Takeaways
- How to make organoids involves precise steps from preparing stem cells to validating organoid identity, enabling reliable 3D cell culture models.
- Organoids, grown from stem or progenitor cells, mimic real organ tissues and are essential for studying development, disease, and drug responses.
- Optimizing key variables like cell source, matrix type, and growth factors is crucial for high-quality organoid formation and accurate experimentation.
- Safety and ethical considerations must be addressed before starting, including biosafety assessments, informed consent, and regulatory approvals.
- Typical organoid culture times vary by tissue type, with regular media changes and careful monitoring needed for healthy growth.
- Mastering how to make organoids offers researchers a valuable tool to explore complex biological interactions and reduce reliance on animal testing.
What Organoids Are, Why They Matter, And When To Use Them
Organoids are three-dimensional cell cultures that mimic aspects of real organs. Researchers grow organoids from stem cells or progenitor cells. These structures reproduce some tissue architecture and basic function. Scientists use organoids to model development, disease, and drug response. Clinicians use organoids to test patient-specific therapy in some research settings. Labs use organoids when they need a higher-fidelity model than flat cell culture. Labs avoid organoids when full-organ physiology or blood flow is essential. Organoids suit studies of cell-cell interaction, genetic perturbation, and short-term drug testing. They provide ethical alternatives to some animal studies, but they do not replace all animal or human experiments.
Typical applications include modeling organ development, studying host-pathogen interactions, screening compound libraries for efficacy or toxicity, and investigating patient-derived mutations. The choice to use organoids depends on the biological question: use them to capture 3D tissue architecture, emergent multicellular behaviors, or cellular heterogeneity; avoid them for systemic physiological processes requiring vasculature, immune system interactions, or whole-organ hemodynamics. Consider throughput needs as well—organoids offer moderate throughput compared with 2D cultures and in vivo studies, and they can be scaled with microplate formats or microfluidic devices for higher-throughput workflows.
Safety, Ethics, And Regulatory Considerations Before You Start
A lab must assess biosafety level before work begins. Work with human-derived cells requires institutional review and informed consent. Work with embryonic stem cells or human embryos requires additional approvals in many regions. Labs must follow institutional biosafety committee guidance and local laws. Personnel must train in cell culture sterility and waste disposal. Labs must treat all human material as potentially infectious until tested. Researchers must document provenance of cell lines and donor consent. Reports must include ethical approvals in publications. Materials that could form neural tissue need special ethical review in some places. Researchers should consult regulators early and keep records up to date.
Practical safety steps include verifying the mycoplasma- and pathogen-free status of lines, using validated cryostocks, and maintaining traceability from donor to experiment. Set up SOPs for handling spills, disposing of biological waste, and decontaminating equipment. For experiments involving genetic modification, follow GMO regulations and containment requirements. When working with patient-derived samples, anonymize data and follow data protection rules. Early engagement with institutional review boards and biosafety officers reduces delays and ensures that the protocol for how to make organoids complies with institutional and national policies.
Step‑By‑Step Protocol For Making Organoids (Overview)
This overview gives a common workflow. The exact steps vary by tissue type. Step 1: Prepare cells. Thaw or isolate stem cells and verify viability. Step 2: Count cells and adjust concentration for aggregation. Step 3: Initiate aggregation in low-adhesion plates or droplets. Step 4: Embed aggregates in an extracellular matrix or use suspension culture as required. Step 5: Provide stage-specific growth factors and small molecules on a timed schedule. Step 6: Maintain culture with regular medium changes and monitoring. Step 7: Validate organoid identity by marker staining or gene expression. Step 8: Use organoids for assays or freeze them for storage.
Below are practical tips for each step so readers learning how to make organoids can avoid common problems:
- Prepare cells: Use early-passage, well-characterized iPSCs or primary progenitors. Check morphology, karyotype if available, and viability by trypan blue or equivalent before starting.
- Aggregation: Optimize the starting cell number per aggregate; too few cells can fail to organize, too many increase central necrosis. Gentle centrifugation or orbital shaking can improve uniformity.
- Matrix embedding: Allow the matrix to gel fully before adding medium to prevent displacement. When using Matrigel, work on ice and pre-chill tips to maintain consistency.
- Timed differentiation: Follow published timing for growth factor addition, but be prepared to titrate concentrations. Keep a detailed log of lot numbers and timings for reproducibility.
- Monitoring and maintenance: Inspect cultures frequently for contamination, morphology changes, and necrotic cores. Adjust feeding schedules or split aggregates if overcrowding occurs.
- Validation: Use a combination of immunostaining for canonical markers, qPCR for lineage markers, and functional assays where possible to confirm organoid identity.
Key Variables To Optimize: Cell Source, Matrix, And Growth Factors
Cell source affects organoid quality. Primary tissue, induced pluripotent stem cells (iPSCs), and embryonic stem cells each give different results. iPSCs let labs model patient-specific genetics. Matrix choice affects shape and differentiation. Matrigel is common but has batch variability. Synthetic hydrogels give more control over stiffness and ligand density. Growth factors set developmental cues. Labs often use WNT, BMP, FGF, and TGF-beta modulators in specific sequences. Timing of factor exposure controls patterning. Cell density during aggregation changes size and necrosis risk. Oxygen and nutrient diffusion limit organoid size: many labs keep organoids under 1–2 mm or use perfusion methods. Researchers must pilot multiple conditions and record precise timings and concentrations.
Other considerations include mechanical cues (stiffness and shear), oxygenation (hypoxia can alter differentiation), and co-culture with stromal or immune cells to increase physiological relevance. When optimizing, change one variable at a time and include internal controls. Record negative results as well as positive ones; they guide protocol refinement and help others reproduce findings.
Essential Materials, Equipment, And Typical Timing
Basic materials include culture media, matrices, cytokines, and validated cell lines. Labs also need sterile low-adhesion plates, pipettes, and microscopes. A biosafety cabinet and CO2 incubator are essential. Researchers often use a plate reader or confocal microscope for readouts. Typical timing varies by tissue: neural organoids form basic structures in 2–4 weeks and mature over months. Intestinal organoids show crypt-like domains in 7–14 days. Liver and kidney organoids often need 3–8 weeks for functional markers. Media changes occur every 2–3 days early and may switch to lower-frequency schedules later. Freezing organoids requires a controlled-rate freezer or a validated cryopreservation protocol. Labs should plan experiments with spare time for troubleshooting and validation assays.
Practical equipment and consumables to budget for when learning how to make organoids include calibrated pipettes and tips, multiple incubators to prevent cross-contamination, and imaging options that match the assay (brightfield for morphology, fluorescence for markers, confocal for 3D structure). Consider small equipment for medium throughput such as automated liquid handlers or multichannel pipettes for consistent feeding. For longer-term cultures, evaluate options for perfusion bioreactors or microfluidic chips that improve nutrient delivery and can reduce necrosis in larger organoids.
Finally, plan experimental timelines conservatively. Allow extra time for initial optimization, QC of starting cell lines, and validation assays. Keep detailed lab notebooks or electronic records with dates, lot numbers, and deviations from protocols to ensure that your approach to how to make organoids becomes a reproducible part of the lab’s workflow.